I caught the bug for building gingerbread houses during my first baking internship, which involved making some huge bespoke ones for a famous department store (even if I was only trusted to stick on the roof shingle pieces).
Despite the quaint tradition of building festive gingerbread houses, gingerbread was once pretty serious business.
Spices, particularly ginger and cinnamon, have preservative properties, and it is thought that gingerbread was first professionally baked in Europe around the 11th century, when exotic spices were brought back from the Middle East. Many credit one particular Armenian monk, Gregory of Nicopolis, with bringing gingerbread to France, where highly skilled gingerbread bakers were chosen to form professional gingerbread baker guilds that were highly regarded in the bakery profession.
In certain areas of Europe, only invited members of the gingerbread baker’s guild were permitted to bake and sell gingerbread commercially, with the restrictions only lifted by the Guild at Christmas and Easter – when any old cook or baker could give it a try.
Now that rule has been scrapped, people all over the world bake gingerbread at Christmas, and some are more ambitious than others. The largest gingerbread house ever created was made by a group of bakers in Texas, US – they built a 2,520-square-foot gingerbread house to raise funds for a local hospital, containing over 7,200 eggs, 3,000kg of flour, and an estimated 35.8 million calories.
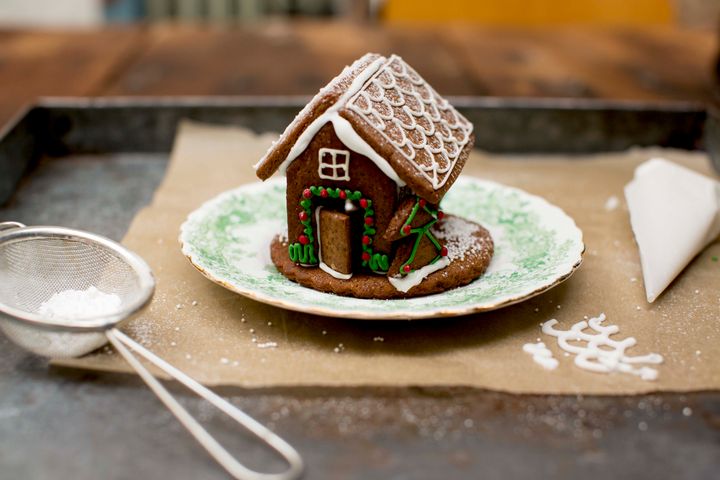
This gingerbread house recipe won’t bake you a mansion, but will show you how to create some dinky, pretty gingerbread houses. Don’t be afraid to give them your own twist – a little bit of practice is all it takes, and I’m more than happy to answer questions via Twitter if you’re struggling. I hope you love the process as much as I do.
All that remains to say is…wishing you all an awesome Merry Christmas break from me, Bee, and my baking team at Bee’s Bakery. Good luck!
Bee’s gingerbread house recipe
Ingredients
- 5 tbsp warm water
- 200g caster (or light brown/demerera) sugar
- 1 tsp allspice
- 3 tbsp each of treacle and golden syrup
- 3 tbsp each of ground ginger and cinnamon
- 250g butter, cold and chopped into small chunks
- 1 tsp bicarbonate of soda
- 520g plain flour, plus extra for dusting
Step 1: Make your gingerbread hot mix
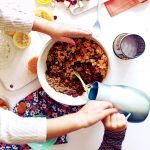
Pop the water, sugar, spices, treacle and golden syrup into a saucepan and bring slowly to a simmer – stirring regularly to ensure the mixture forms a well-combined, consistent gloopy mixture. Do not let it boil furiously or stick to the sides of the pan. Once it’s all combined, the mixture will look glossy and rich and smell absolutely delicious! Take it off the heat and add in your chopped butter, stirring continuously until combined – it may look like it won’t all mix in, but it will – keep at it! Set the mix aside and allow to cool slightly (you want it to be warm to the touch but not too hot to handle) while you measure out your remaining ingredients.
Step 2: Combine to make dough
Sprinkle your bicarbonate of soda into the bottom of a large bowl and pour your warm mixture on top (ensure every drop goes in). Using a wooden spoon, bash around in the bowl until the bicarb is thoroughly mixed in – the mixture will increase in volume slightly. Pour in your plain flour and bring together with a wooden spoon – this will require some elbow grease. You want to end up with a nice, firm gingerbread cookie dough, so if it feels too wet, add in a little bit more flour but don’t let it get too dry or crumbly.
Place the ball of dough on top of a piece of cling film, sandwich with another piece and roll the dough out between the two. Chill the slab of dough in the fridge for 30 minutes and it’ll harden up nicely.
Step 2: Roll and cut the dough
Roll dough to 0.5cm thick on a floured surface – the key here is to go heavy on the flour on the table, and light on the flour on the top of the dough. You’ll find that baking with flour on the top of these cookies makes little marks after baking – not so pretty.
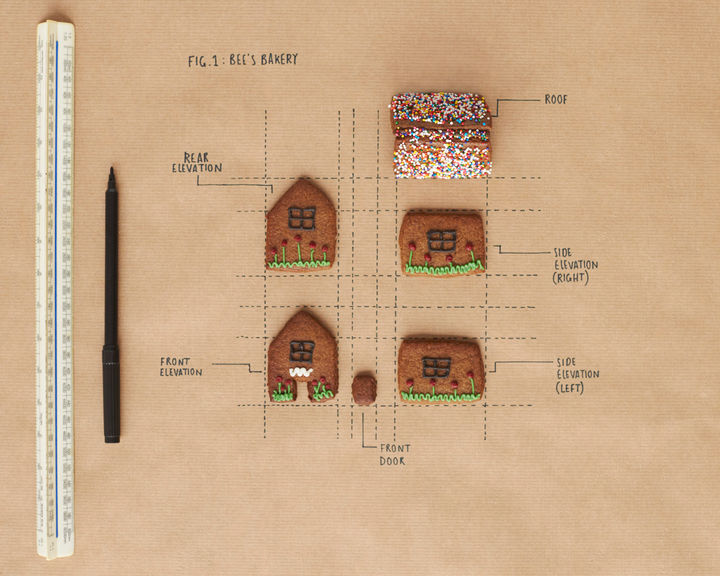
Cut your gingerbread house pieces as follows:
- 2 x roof pieces – measure out a 8cm x 5cm rectangle of card
- 2 x side pieces – measure out a 7cm x 4.5cm rectangle of card
- 2 x more side pieces, which will actually form your front and back – as above measurements, with a slanted roof cut at 4.5cm tall – see the pic below to guide you
- 1 x base piece to stand the gingerbread house upon – this can be round or square but must be about 10-11cm across
- You could also do a door and a tree if you’re feeling adventurous
Cut as many pieces as you can from the dough, including a few spare pieces in case of any breakages in the baking or decorating process.
Transfer the cut cookies onto the baking sheet and chill again for at least 20 minutes. Meanwhile, preheat your oven to 180ºC/350ºF.
Step 3: Bake your biscuits
Pop your cold baking tray directly into the hot oven and bake for 12-15 minutes, until they start to turn dark brown at the edges. The cookies will still feel a little bit soft in the middle, but they’ll harden up when cool, so let them set completely before starting to build your houses. Baked gingerbread will last for at least two weeks if kept in an airtight container.
Step 4: Decorate the gingerbread pieces.
Prepare stiff-peak consistency royal icing using Jamie’s recipe from his Christmas cake. If you don’t fancy making your own, most supermarkets sell ready-made coloured icing in tubes and this’ll work just fine!
If you’re confident using piping bags, nozzles, and different colours, then divide up your icing into four bowls as follows:
- Super-stiff peak icing (this will act as your “glue” when you assemble the house) – pop into a piping bag with a 3-4 size nozzle
- Stiff-peak icing, coloured green using a green paste or gel colouring – put into a piping bag with a size 1.5 nozzle
- Stiff-peak icing, coloured red using a red paste or gel colouring – put into a piping bag with a size 1.5 nozzle
- Stiff-peak icing left white – put into a piping bag with a size 1.5 nozzle
Decorate your gingerbread house pieces any which way you like! Silver or white sprinkles look great on the roof or you can pipe individual bricks or shingles if you prefer. It’s nice to add personal touches if you’re giving the house as a gift – for example, by icing the house number onto the front door or the name of the street on the side of the house.
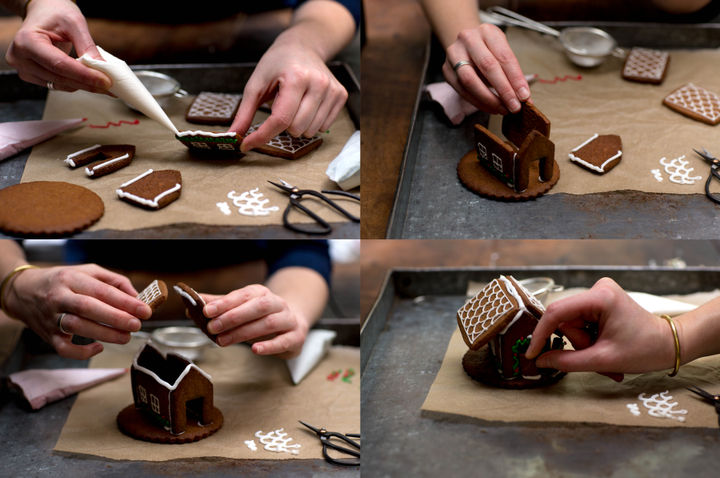
Step 5: Assemble your house
Lay out all the pieces you’ll need for one house and, using your super-stiff-peak icing in a bag to act as your glue, pipe lines of icing on the edges of your pieces.
Allow the walls of the house to set for about 10 minutes before adding the roof. The key here is more is more! More icing will help the house stay solid and in one piece, so don’t be shy to stick it all together with lots of the stuff – once it’s put together you can cover up the joins with decoration if necessary.
Allow your house to set for an hour before packaging it up – either into a gift box or a large cellophane bag – and hey presto! A beautiful little house, ready to bite into!

Storage and freezing instructions
Make the recipe and when you reach stage two, store uncooked dough in the fridge, wrapped in cling film or a freezer bag for up to one month. When ready to use, remove the frozen wrapped dough and defrost overnight in the fridge before use.
For baked houses and cookies, store in an airtight tin or container for up to one month.