Jam making is not just for experts. You don’t need fancy equipment to learn how to make jam, just a couple of ingredients and a few nifty tips. It’s a simple pleasure that makes the most of seasonal fruit so that it can be enjoyed for months to come.
Fruity preserves are a staple at British fêtes and food markets, and around the world many countries have their own twists and traditions on preserving fruits. Homemade jam makes a brilliant gift, or will sit happily in your cupboard for months, ready and waiting for a buttered sliced of toast. So, if you’ve got a few empty jars and an hour to spare, gather a glut of your favourite fruit and get jamming!
You can pick fruit yourself or buy it when it’s in season (when it’s at its tastiest and cheapest), and either make a jam there and then, or freeze the fruit ready for another time.
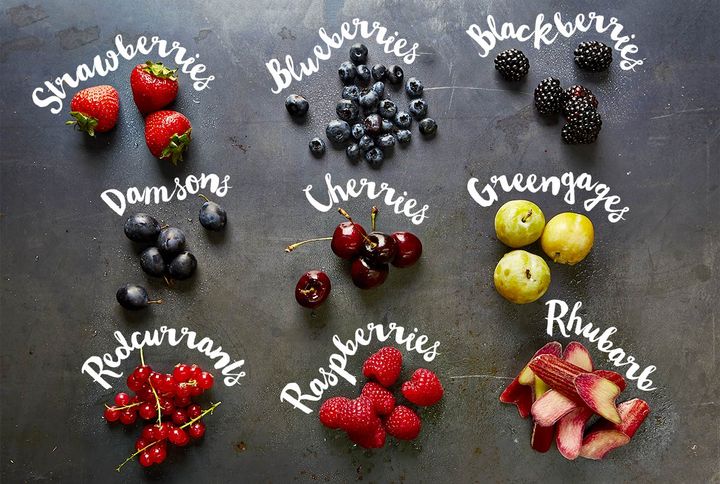
To help you out, Jamie’s gardener, Pete Wrapson, has created a list of the best jam-making fruits and their seasonality here in the UK:
- Rhubarb (forced): January – April
- Rhubarb (outdoor): April – early July
- Strawberries and gooseberries: June – July
- Cherries – July
- Black/red/white currants: July – August
- Blueberries and raspberries: July – September
- Raspberries: July – September
- Blackberries, loganberries and greengages: August – September
- Damsons: September – October
THE TECHNICAL PART
Fruit that is slightly underripe will make better jam than softer, sweeter, overripe fruit as it has a higher acidity which lends itself better to the process.
PECTIN
Pectin naturally occurs in lots of fruit, usually in the pips, cores and skins, and is what will make your jam set. When boiled pectin is released from the fruit in your jam. Fruits like blackberries, blueberries and strawberries are quite low in natural pectin, so will need a little help along the way, which is why in Jamie’s strawberry jam recipe he uses jam, or ‘high pectin’ sugar.
EQUIPMENT
Preserving pans are big and wide giving the largest possible surface area, allowing for faster water evaporation and a more concentrated flavour to your jam. But if you don’t have one, just use the largest (widest) saucepan you can find.
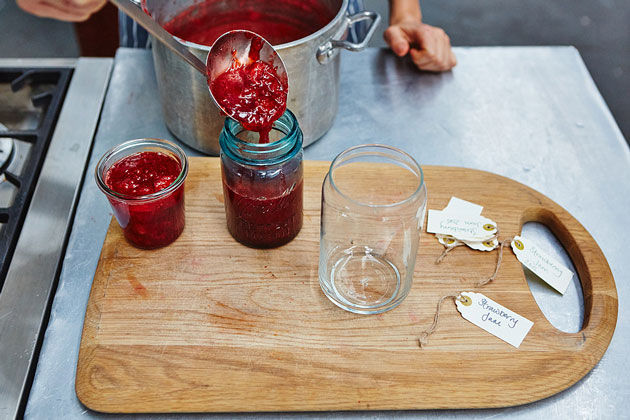
HOW TO STERILISE JARS
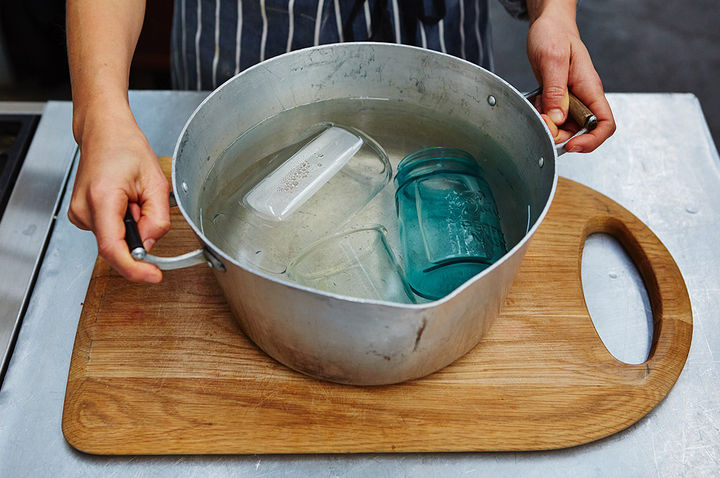
This part is important as it will mean your jars are free from any nasty bacteria that will cause you jam to mould and go to waste. If you have a good dish washer with a very hot cycle you can sterilise jars that way, otherwise wash your jars and lids (removing any rubber seals) and place them on a baking tray in the oven at 100℃/225℉/gas ¼ for 30 minutes until dry. If your jars have rubber seals, boil them in a saucepan of water while the jars are in the dishwasher or oven. Being very careful, remove the jars and lids from the oven with gloves or tongs, fish out and dry off your rubber seals, and you’re good to go. It’s important that you fill your jars with jam while they’re still hot, so plan ahead to make sure you’re ready.
THE FUN PART
Jamie’s recipe for incredible homemade strawberry jam is super-simple and will give you a delicious, soft set, sweet and sticky jam.
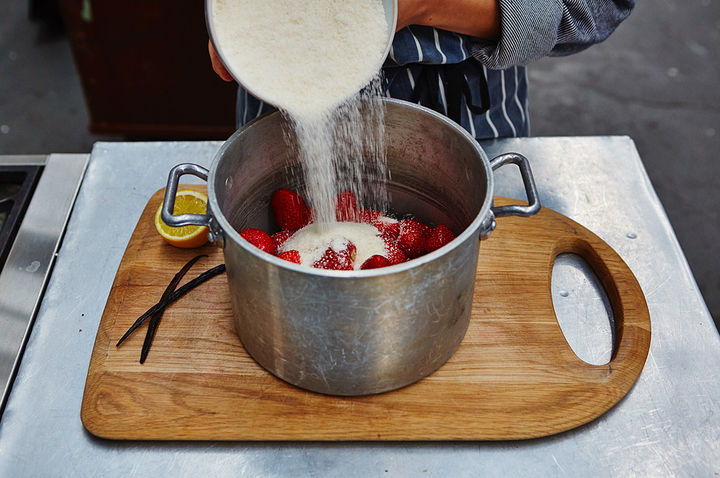
- While your jars are sterilising (see above), wash your fruit and add to a large pan with the sugar. Here is where you can get creative with spices, herbs and other flavourings to complement your fruit. Try this Gooseberry and elderflower jam recipe for a beautiful pale and floral jam. A vanilla pod or slug of balsamic vinegar is delicious with strawberries, rosemary works a treat with peaches, star anise or cinnamon with plums, or pimp up your rhubarb with chopped stem ginger. For super-sweet fruits, a splash of alcohol can give an amazing twang and help balance flavours beautifully.
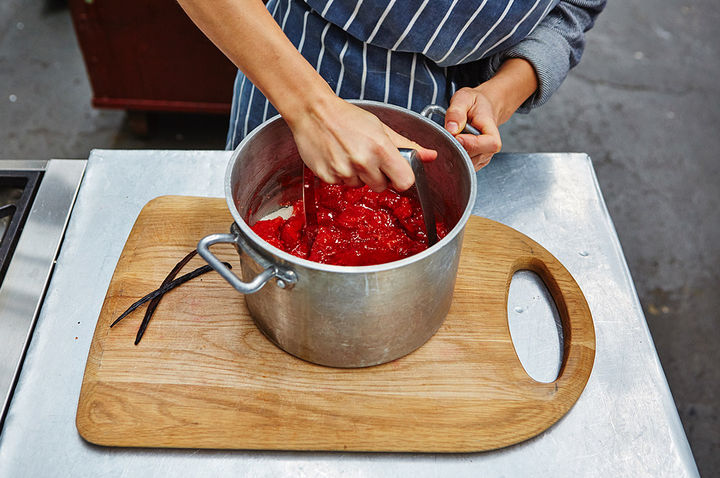
- With a potato masher or fork, mush the sugar, fruit and any added flavours together into a lumpy pulp. The fewer lumps, the smoother your jam will be.
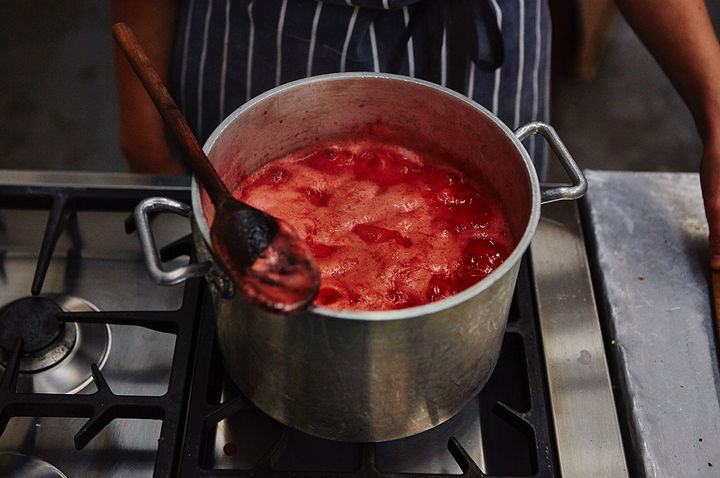
- Place your pan onto a medium to high heat and leave to simmer for approximately 5 minutes. Don’t be tempted to stir too much, it will reduce the temperature, so stand back, enjoy the steam and the smells and leave it to do its thing,

- Your jam will need to reach 103 to 105℃ for it to set, but to save you fiddling around with thermometers have a go at ‘the wrinkle method’: a top tip for checking if your jam is ready. Pop a plate in the fridge and when you’ve reached the boiling time specified in the recipe, or you think your jam is almost set, take a teaspoonful from the pan (be careful, it will be scorching hot) and pour onto the cold plate. Gently push the jam with your finger and if the jam wrinkles slightly, it will set when cool. If it doesn’t, leave on the heat for a few more minutes and repeat until wrinkles appear.
- Turn off the heat and skim any strange looking foam from the top of the jam and throw away.
- While your jars are still hot, fill them right up to the top. Wax-paper seals were traditionally used to top preserves, but aren’t necessary if you have sterilised your jars properly as the lid will act as a sufficient seal. That said, there is something incredibly satisfying about peeling off a smooth paper film to bright, shiny jam underneath! Once filled, secure tightly with a lid, leave to cool and label them up with homemade labels.
- Store in a cool dry place and enjoy dropped into pastry cases to make rainbow jam tarts, spread onto crumbly scones, layered between sponge cakes or dolloped in a bowl of steamy porridge.