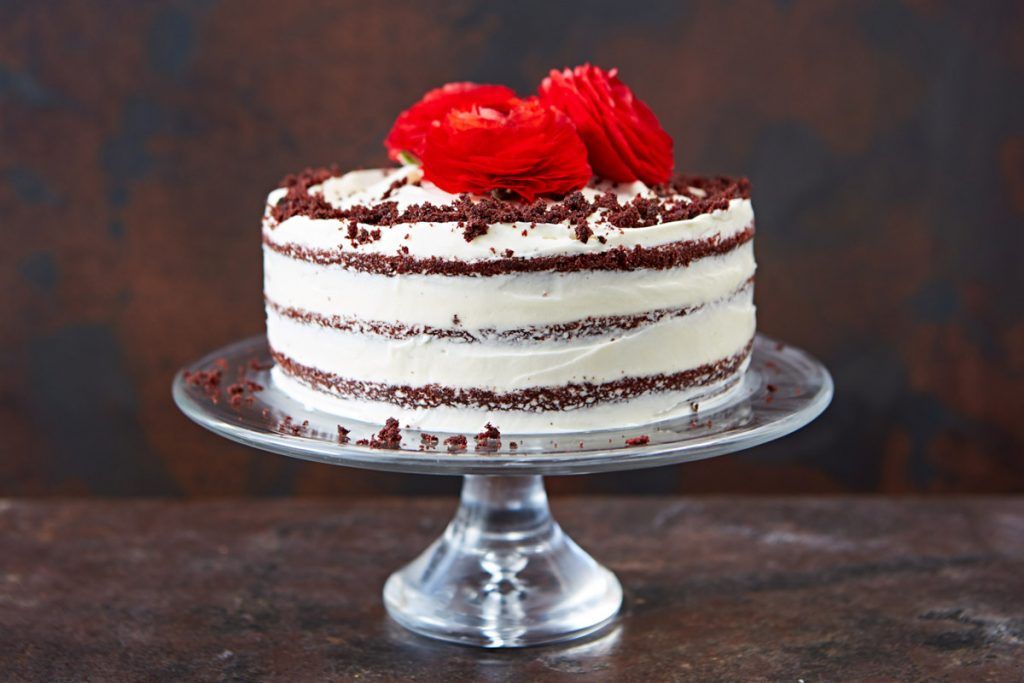
Smooth, chocolatey sponge smothered with rich buttercream icing, it takes a lot to beat the beautiful indulgence of red velvet cake. Here, Georgina Hayden from Jamie’s food team shares her fail-safe recipe.
With its striking red sponge, I must admit, I was initially cynical of red velvet cake and imagined it to be style over substance – I hadn’t eaten anything that vibrant since I was a kid.
But while on a pilgrimage to Magnolia Bakery in New York (many, many moons ago), I knew I would be a fool to not give it a go, and, when I tried it, it truly blew me away. It tasted nothing like I expected – it was, in fact, a deliciously smooth chocolate sponge with a creamy and ever-so-slightly tart cream cheese frosting – for me, a perfectly-balanced combo.
So my love affair with red velvet cake started, and ever since then I’ve been hooked. Apparently, I’m not the only one. Since its relatively recent arrival in the UK (compared to the States, that is), it has become a firm household favourite, despite being thought to be almost 200 years old.
WHY IS RED VELVET CAKE RED?
Originally a classic southern-American recipe, its name sparks much debate. Some say the “red” refers to the sugar that was originally used (brown sugar was traditionally referred to as red sugar), while mostly it is thought to refer to the red colour of the sponge and its velvety texture. Traditionally, the red hue came from the reaction between the cocoa powder and the acidic vinegar and buttermilk. Cocoa naturally contains anthocyanins, a compound found in red foods (such as red cabbage), which gives it a strong pigment. However, nowadays, our cocoa is processed differently and is treated with an alkalinising agent that neutralises the acid, making the colour less vibrant. So even if you follow your great-great-grandma’s recipe, you’ll almost certainly still end up with a less vibrant sponge.
GET THE PERFECT SPONGE
Thankfully, however, the combination of bicarbonate of soda with the vinegar and buttermilk still give red velvet cake its smooth, iconic consistency. Even though the recipe may sound a little fiddly, alternating the wet and dry ingredients is what gives it that gorgeous creamy feel.
Red velvet is a wonderful chocolate cake alternative, something a little different and is perfect for any celebration. And unlike a lot of chocolate sponge recipes, which have a tendency to dry out quite quickly, I can safely say that this stays moist and still tastes fresh a few days later, making it a perfect cake to make in advance.
RED VELVET CAKE WITH CREAM CHEESE ICING
Serves 12 to 16
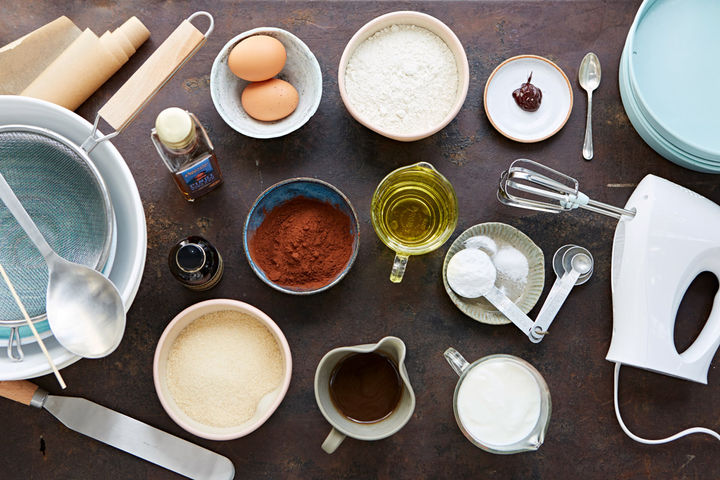
250g plain flour
1 ¼ teaspoons bicarbonate of soda
40g cocoa powder
240ml vegetable oil (or any flavourless oil)
300g golden granulated sugar
2 large free-range eggs
2 tablespoons red food colouring
½ tablespoon good quality vanilla extract
100ml freshly brewed coffee, cooled
240ml buttermilk
½ tablespoon white wine vinegar
175g unsalted butter, at room temperature
400g icing sugar
300g full-fat cream cheese
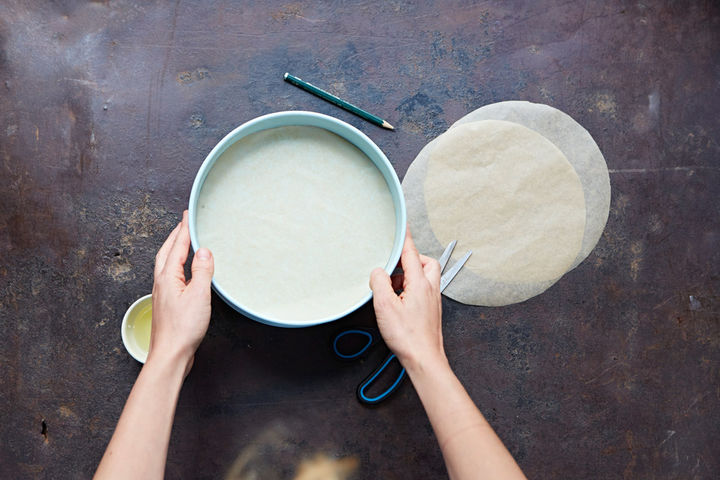
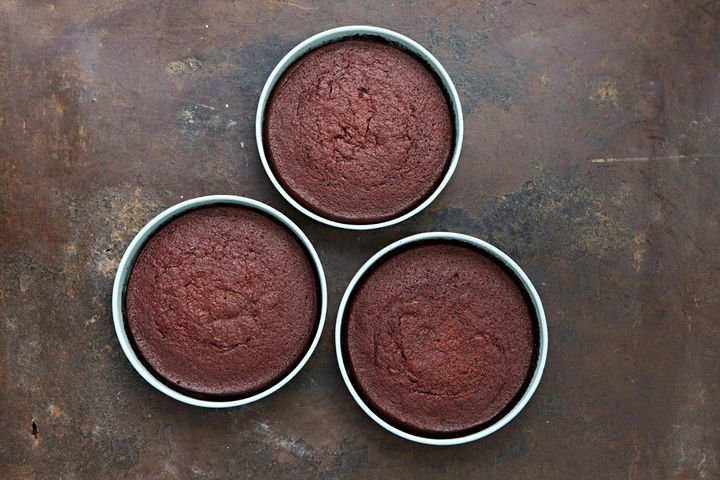
- Preheat your oven to 180ºC/350F/gas 4. Grease 3 x 8” sandwich tins and line the bases. (Alternatively, you can do this in 2 x 8” springform cake tins, if you have them).
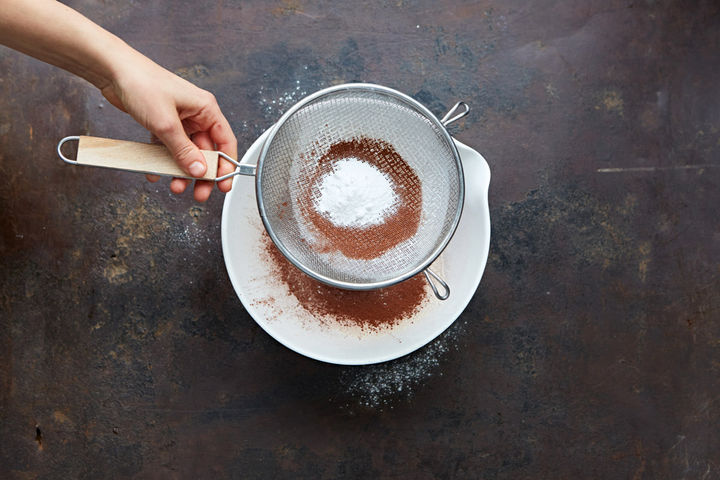
- Sift the flour, ½ teaspoon of fine salt, bicarbonate of soda and cocoa into a large bowl and leave to one side.
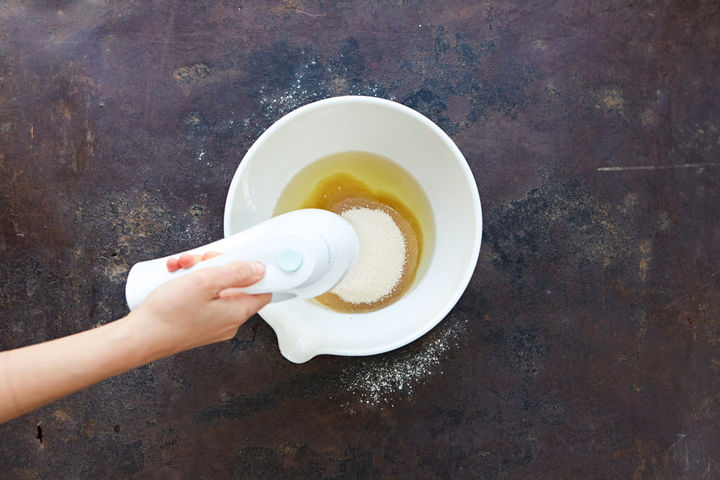
- Pour the oil into the bowl of a freestanding mixer (or you can use a large bowl and electric whisk) and add the granulated sugar. Gently beat together for a couple of minutes, until pale.
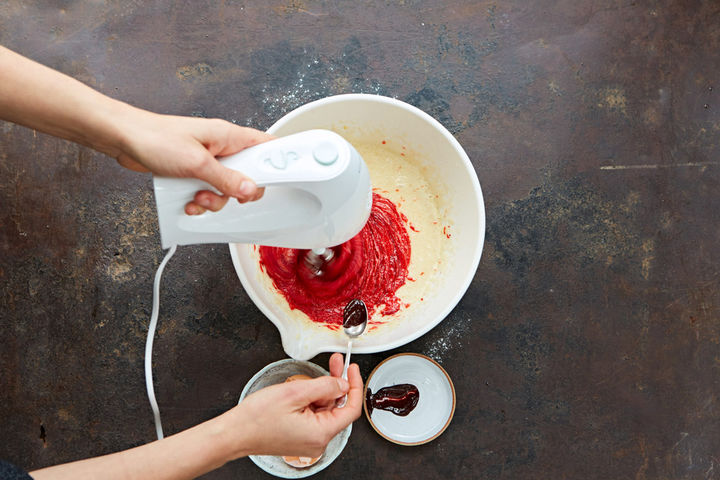
- Add the eggs, beating them in one at a time, and then mix in the red food colouring and vanilla extract.
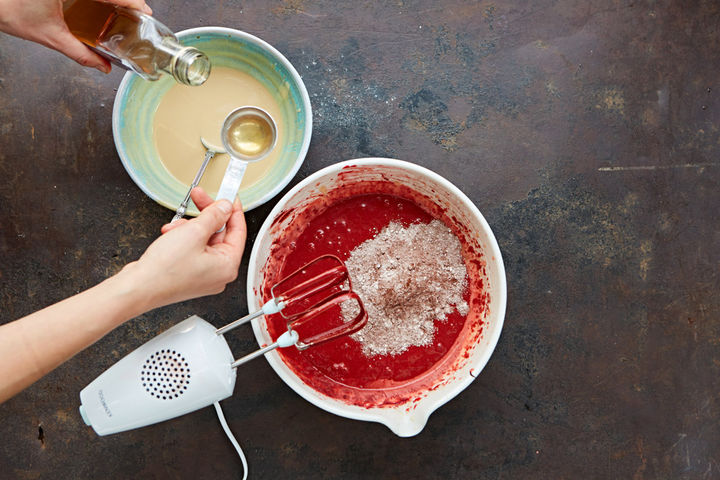
- Spoon in ⅓ of the sifted flour mixture, and mix together. Mix together the cooled coffee and buttermilk, and add half to the mixing bowl. Beat it in, then beat in half the remaining flour.
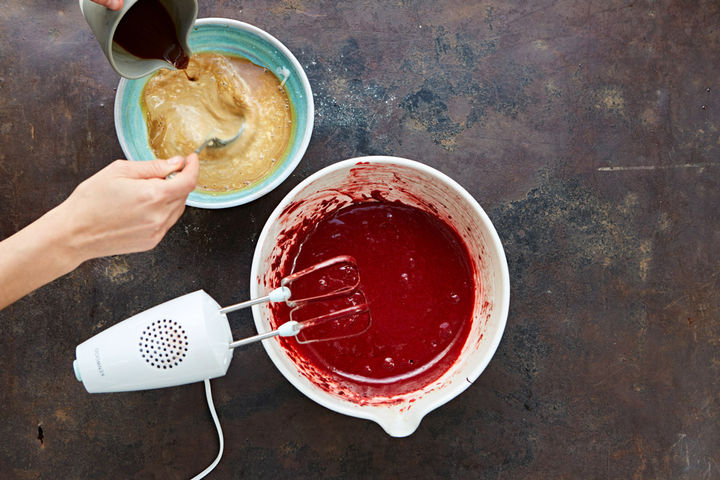
- Stir the white wine vinegar into the remaining buttermilk and pour it into the cake mixture. Beat it in well and finish by folding in the last of the flour.
- Beat everything together well, then evenly divide between the tins. Bake in the oven for around 35 to 40 minutes, or until cooked through and a skewer comes out clean. Leave to cool in the tins for 10 minutes, then transfer to a wire rack and leave to cool completely. (If your cakes are a little domed, that’s great, slice off the excess sponge and keep it for decorating later).
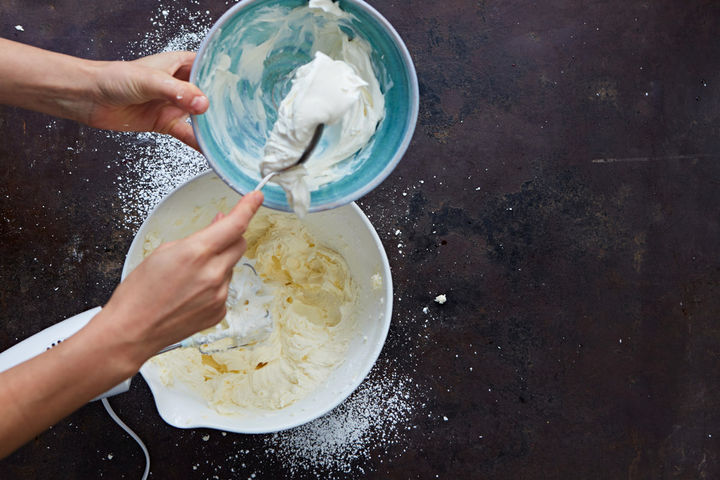
- To make the cream cheese frosting, cut the butter into chunks and place into the bowl of the freestanding mixer (or use a mixing bowl and electric whisk), and beat with the paddle attachment for 2 minutes until very pale and creamy. Sift the icing sugar into the bowl in 3 stages, beating it well in between until smooth.
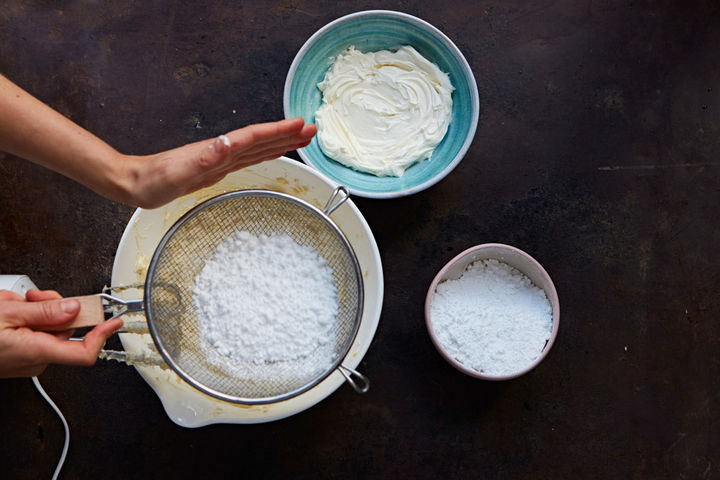
- Drain any excess liquid off the cream cheese – I spoon it into a sieve to drain it completely. When all the icing sugar has been incorporated, spoon a large tablespoon of the cream cheese into the bowl and beat it in, scraping the mixture off of the sides as you go. Add half of the remaining cream cheese, beat it in for 30 seconds, scrape the sides of the bowl again and add the remaining cream cheese.
- Beat rigorously for a minute or two. It’ll look like liquid at first, then it’ll come together and appear light and whipped. Be careful not to beat the icing too much though, otherwise it will end up runny again. Spoon into a bowl and pop into the fridge for half an hour to firm up a little.
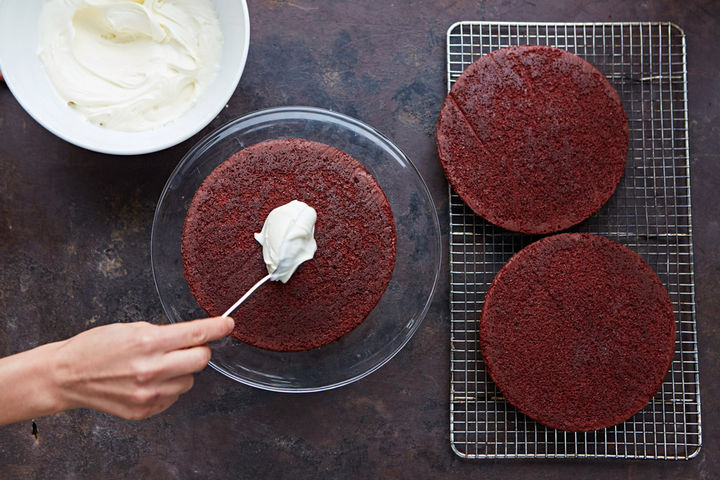
- Dot a teaspoonful of the cream cheese icing onto your chosen cake stand or board and top with one of the cakes. Dollop a couple of large spoonfuls of icing into the middle of the cake and evenly spread it to the edges, leaving a bit of a border, as it’ll ooze a little when you place the next sponge on top.
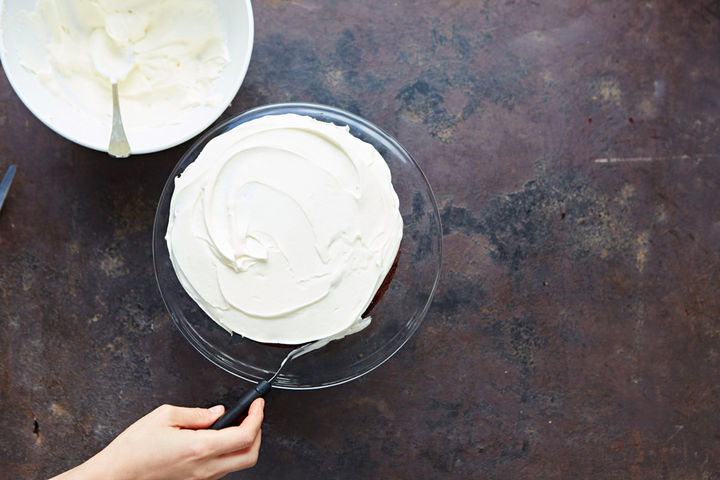
- Keep going until all the sponges have been layered up and finish by decorating with the remaining icing. I like to have a scant layer around the outside, so that you see all the layers through, but apply it as thickly as you like (make extra if you want to finish it with a piped pattern).
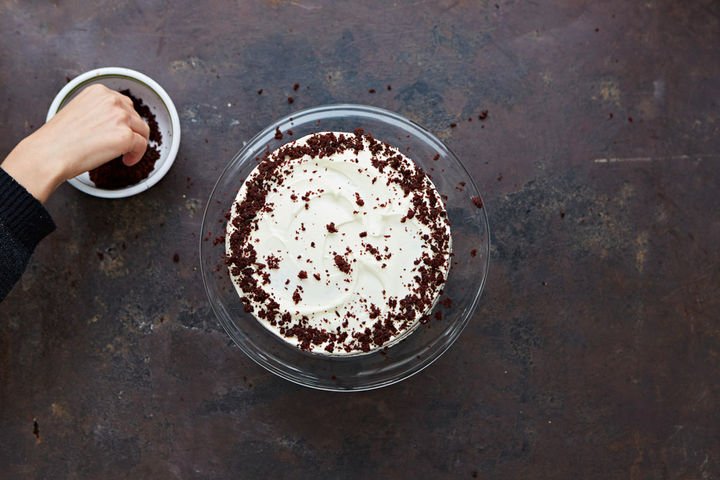
- Decorate by crumbling up any offcuts of the sponge, then sprinkle around the top edge of the cake.
Tip: If you want to make this cake even further in advance, wrap the individual, cooled sponges thoroughly in a couple of layers of clingfilm. Then wrap them well in foil and pop them in the freezer – they’ll last this way for a few weeks. Defrost completely before decorating.
Once you’ve perfected your red velvet why not impress your friends with this Red velvet cheesecake from Donal and Lanlard Skehan:
For more bakes that embrace the wonderful ingredient cocoa, check out our chocolate cake gallery.