PHEW, it’s hot in the Bee’s Bakery kitchen. The only respite seems to be sitting in the park after work and chilling out with some snacks and drinks on a blanket.
Since I opened my bakery, there is absolutely no way I can get away with shop-bought bakes for these events, and more often than not, my friends expect something personalised and unique if we meet for a picnic – lucky them! Naturally, I’m often struck with a panic just before I leave the house – what is super quick, easy, has simple ingredients, but still impresses at a picnic in the park? Scones, of course.
Scones work for me every single time. I always have the ingredients in my cupboards, and they take about 20 minutes to knock out. What’s even better is that if I have to literally throw them into a basket before I run out the door, they’re even more delicious and impressive served warm.
Savoury scones are also very cool, and unexpected, and luckily Jamie has a great recipe for some cheesy ones with cumin.
Looking into the history of the scone, I am absolutely delighted to report that, like me, they are of Scottish origin! According to Webster’s dictionary, they originated north of the English border in the early 1500s, though their format was a wee bit different back then. A kind of quick bread, they were often made with oats or oatmeal, and often cooked on the griddle rather than the oven. The origin of the name is contested, with the Dutch claiming the word Scone originated from their word for beautiful quickbread “Schoonbrot”, but although I may be biased, I believe the Scots on this one; they say that the word originates from the Scottish Stone of Scone, or Stone of Destiny, a hugely important relic in Scottish history, which was used to enthrone Scottish Monarchs. The story goes that the English Monarch Edward I pinched the stone in 1296 and it has remained in England until the present day – underneath the coronation chair in London’s Westminster Abbey.
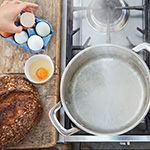
Now, back to baking: making my own strawberry jam always gets me extra brownie points too, and there’s a super simple straightforward recipe that I follow, that works for me every single time – I’ve included it below.
The origin of preserving fruit is a bit simpler, and doesn’t involve any Scottish—English rivalry! It seems that the Romans were the first to record methods for preserving fruit with honey and, later, sugar, and recipes for preserving fruit and vegetables using spices, vinegar and salt in addition to sugar were part of the history of chutney-making in India.
I had no idea that the components of scones and jam were so steeped in history, to be honest. I learnt my first scone recipe from one of Mary Berry’s books from the ‘70s, and at the time I thought this was ancient enough!
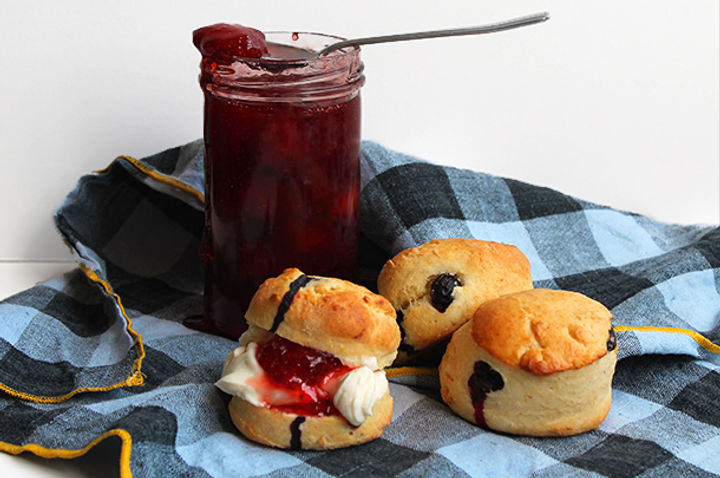
So here it is; my recipe for homemade blueberry scones and strawberry jam. You can substitute the blueberries for dried fruit – either sultanas, or dried cranberries whichever you like. If using dried fruit, I often like to soak it in hot water for about 20 minutes before use, so that it becomes plump and juicy. Have a little play with the amount of fruit you add to find your perfect amount.
Blueberry scones and strawberry jam recipe
For the blueberry scones:
- 220g white self-raising flour
- 50g butter at room temperature
- 20g white caster sugar
- 150ml/5fl oz. full-fat milk
- A handful of small blueberries (cut the big ones in half)
- 1 free-range egg, beaten, for glazing
For the jam:
- 500g fresh strawberries, washed and dried
- Juice of half a lemon (no pips please)
- 500g jam sugar (most supermarkets sell this – it includes pectin, which helps the jam to set)
This recipe makes enough for about two jars but you can double it for more.
Method – for the jam
Try to make sure that the strawberries are roughly the same size by chopping any giant ones into the same size pieces as the smallest ones. This helps them to heat and all cook at the same speed.
In a large flat-bottomed pot or pan, gently heat the strawberries with the lemon juice gently until they are softened. Add the jam sugar and stir all together over a low heat (no frantic boiling or burning) until the sugar has dissolved into the strawberry mixture.
Bring the contents of the pot to a solid, steady boil where the jam is bubbling evenly across its surface, stir once to make sure nothing is catching on the bottom of the pan, and boil constantly without stirring for around 5-7 minutes. You’re looking for a steady slow bubbly boil here, not a mad violent spitting boil as this will burn the jam and mess up your kitchen too.
After about 5-7 mins, the jam will reach what I known as “setting point”, where you know it has cooked for long enough to be able to set into a firm jam consistency. To test if you’ve reached this point, spoon a little bit of the liquid onto the plate and leave somewhere cool for a minute. Using your finger (making sure the jam isn’t so hot it’ll burn you), prod the blob of jam – if it wrinkles, looks like its forming a skin and stays to the place where you’ve pushed it, then hey presto, you have jam! If not, boil for another minute and repeat the process.
Once its done, remove from the heat and allow to cool a bit, at which point you can pour/spoon/ladle it into sterilised jars (you can sterilise old jam jars by boiling them in a large pot of water for a couple of minutes to kill off any bugs). Pop the lids on and boom – you’ve got jam.
Don’t be disheartened if your first attempt is a bit too runny, or a bit too solid for your liking – try it again and use all your learnings from the first batch to become a jam-maker extraordinaire.
Method – for the scones
Pre-heat your oven to 210 °C and lightly grease a baking tray/sheet.
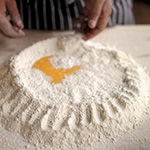
In a large bowl, mix together the butter and flour using your fingertips until the butter is all mixed in. Add the fruit – coating it in the flour mixture will help the fruit to keep its shape without popping in the oven.
Once all the fruit is combined, add 2/3 of your milk and mix very gently with a wooden spoon. You’re looking to work the dough as little as possible, which will ensure light and fluffy scones.
If the mix looks too dry, add some more milk – you want a mixture that doesn’t stick to the sides of the bowl but forms a nice floury lump in the middle.
Tip your scone mixture onto a floured worktop/board and very lightly, for the least amount of time possible, knead together for a few seconds until it forms a round. Press down or use a rolling pin gently till you reach a consistent thickness of about 4cm.
Using your favourite round cutter, or the rim of a small teacup or jar, whichever you have, cut as many circles from the dough as you can. Gather up the scraps and bring together into another round that you can cut more scones from – placing the ones you’ve already cut onto your baking tray a good few centimeters apart.
Using the egg wash and either a pastry brush or your fingertips, brush the tops of your scones with the egg – this’ll give a nice rich shiny top to your scones. Try not to let the egg mixture run down the sides of your scones, or it’ll seal the edges and stop them rising all the way round, meaning you’ll get a wonky scone.
Bake for about 12–15 minutes. To test if they’re done, identify the wonkiest/most misshapen scone you have on your tray, remove it from the oven and cut open to check whether its cooked all the way through. If not, pop them all back in the oven for a minute.
Once cooked, allow to cool a wee tiny bit, cut into halves and spoon some of your awesome strawberry jam on top, with a little bit of clotted cream, or cream cheese if you have it, and enjoy!